
Microsoft Deployment Toolkit is one of Microsoft’s solution accelerators. These products are available for free and are supported by Microsoft covering a number of aspects to managing Microsoft technologies.
MDT can allow you to deploy Windows with very limited interaction from start to finish. It can work by booting from a CD, a USB, or when paired with Windows Deployment Services on Windows Server, MDT can be used across the network starting with PXE boot. The Deployment Workbench tool of MDT allows you to custom configure your deployment in a number of ways – from what drivers are included for a model to setting the time zone and pre-populating a product key.
MDT 2013 Update 2 is now available. It brings a number of fixes to the deployment of Windows 7 through Windows 10. A summary of major changes in this version, from the MDT Team blog:
- Security- and cryptographic-related improvements:
- Relaxed permissions on newly created deployment shares (still secure by default, but now also functional by default)
- Creating deployment shares via Windows PowerShell adds same default permissions
- Updated hash algorithm usage from SHA1 to SHA256
- Includes the latest Configuration Manager task sequence binaries
- Enhanced user experience for Windows 10 in-place upgrade task sequence
- Enhanced split WIM functionality
- Fixed OSDJoinAccount account usage in UDI scenario
- Fixed issues with installation of Windows 10 language packs
- Various accessibility improvements
- Monitoring correctly displays progress for all scenarios including upgrade
- Improvements to smsts.log verbosity
- Fixed Orchestrator runbook functionality
I am installing MDT on Windows Server 2012 R2. It is very quick to get up and running though you can spend a long time getting it perfectly tailored to your environment.
Having a dedicated server for the task, I have a drive separate from the operating system for deployment. In preparation, I created four folders: ADK, MDT, DeploymentShare, and DeploymentAdmin.

The installer for MDT 2013 Update 2 is available through the Microsoft Download Center. The Windows ADK for Windows 10, Version 1511 is a pre-requisite to installing MDT. With those two downloaded to your computer, install the Windows ADK first. You only need Deployment Tools, Windows PE, and USMT (optional). You might also include ICD with the installer for options to customize Windows 10 images. The ADK install process will download the parts it needs. When asked for an install location, I provided the ADK folder I previously created.

Once ADK is installed, you may install MDT.

I went with the default options through the MDT install except for choosing the MDT folder I previously created for the install location.

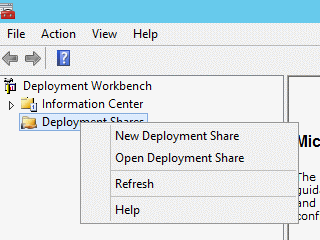
Once MDT finishes the install, you may find Deployment Workbench on your Start Screen. Launch it. Right-click on Deployment Shares and create a new deployment share.
The first deployment share created, will be used by technicians and others using the image. It’s a good practice to setup a second deployment share for administering MDT by capturing images or testing out settings. When creating the shares, provide it with the respective path of the previously created folders.

Once you are all done, your tree will be much more populated. You can expand your share. Right-click on each share and explore the properties of that share with which features you will use in your environment. After you finish modifying any rules or settings on the share, right-click it again and choose Update Share. This will rebuild the WIM you can use with WDS for PXE booting or an optional ISO file for CD/USB booting.

You will proceed forward by importing operating systems, which can be from your install DVDs or ISO files or from captured images. You will also import drivers and applications. Each one of these areas could be its own future topic with different options and best practices. As far as getting MDT up and running though, we can proceed with the minimum structure in these areas.
Lastly, when you have an operating system, drivers, and applications available, you can tie them all together using a Task Sequence. The task sequence is a procedural order of steps that the deployment process will automate for you. You can choose which OS is installed, applications used, and various settings, including custom settings to script parts of your imaging.

Once your first task sequence is ready and you have configured your booting method, you can access your MDT and deploy your first Windows operating system. From here, you can dive back into the settings and find what works best for you and unlock the potential of using Microsoft Deployment Toolkit in your environment.